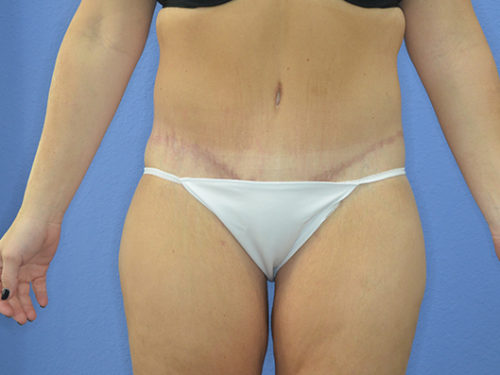
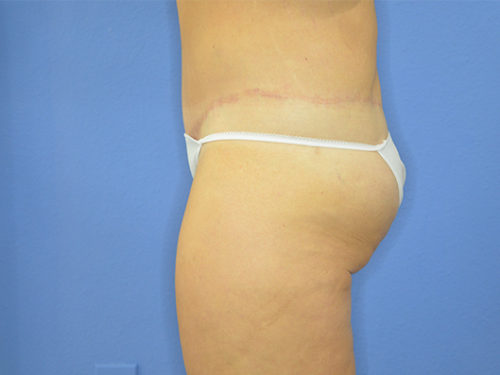
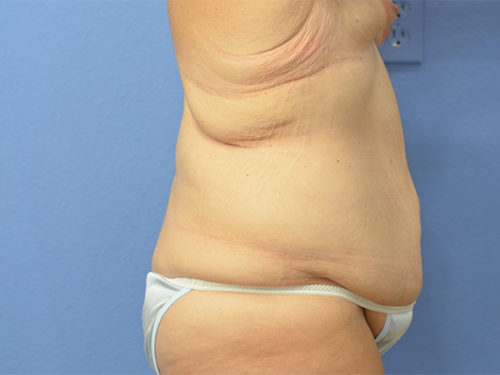
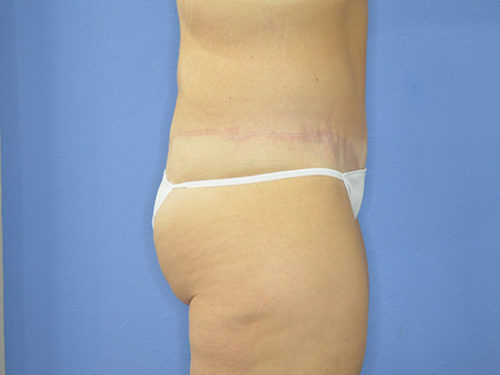
Body Lift Gallery
Back To Galleries
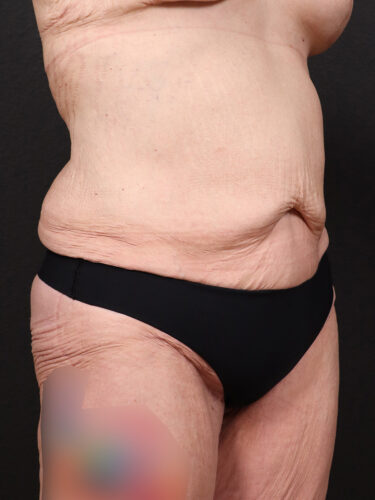
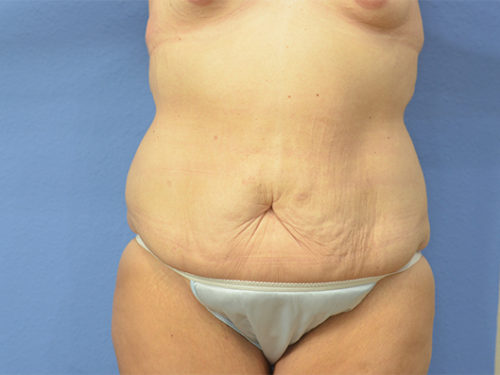
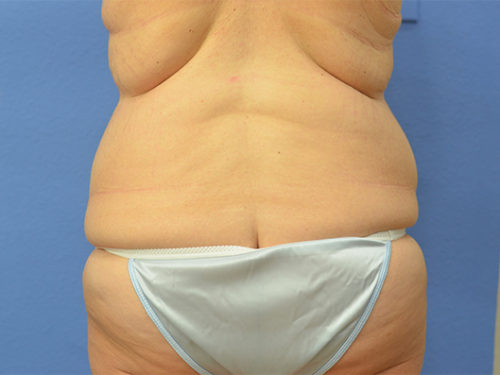
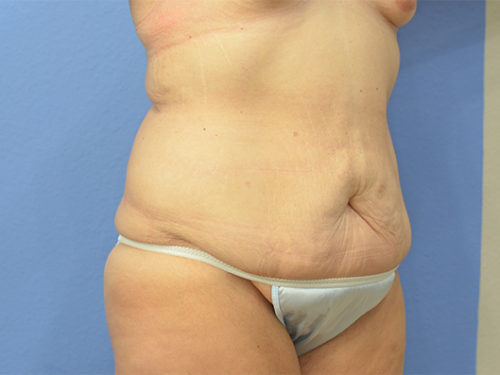
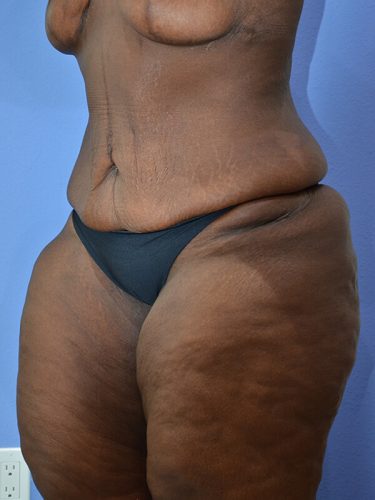
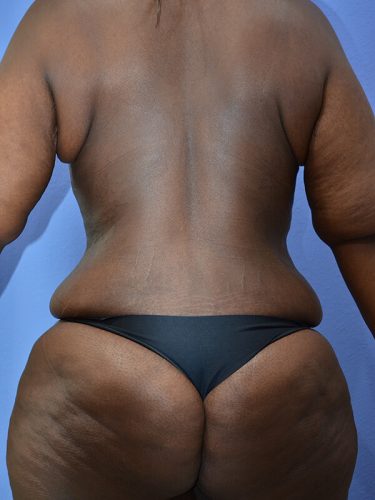
![Before Image]()
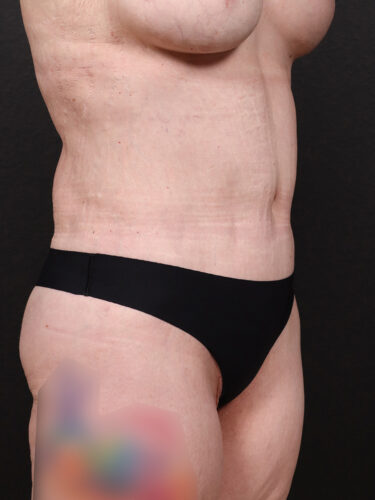
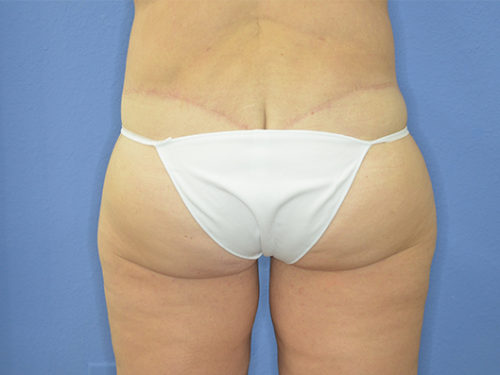
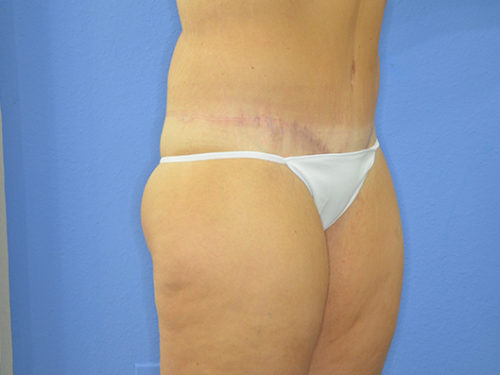
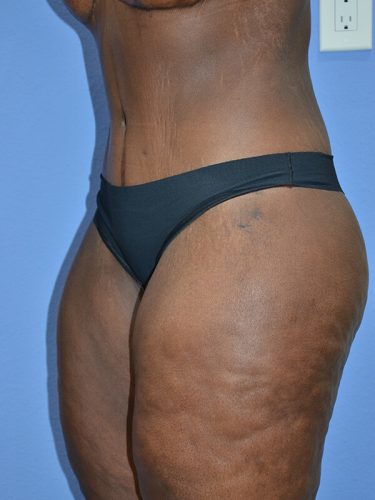
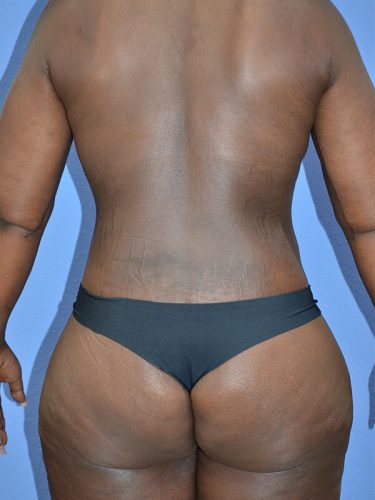
![After Image]()
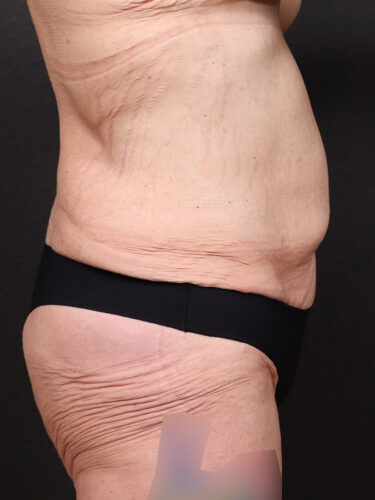
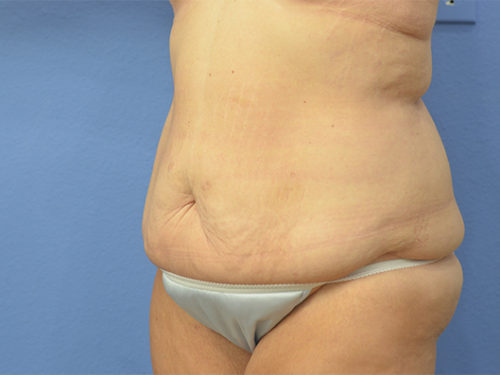
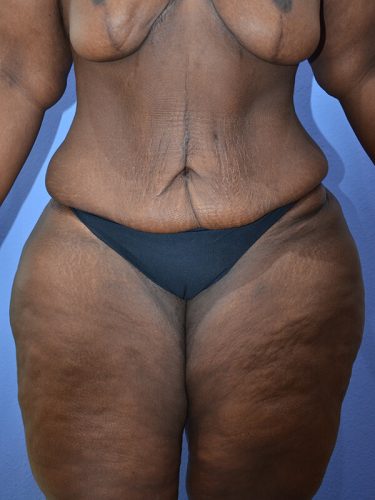
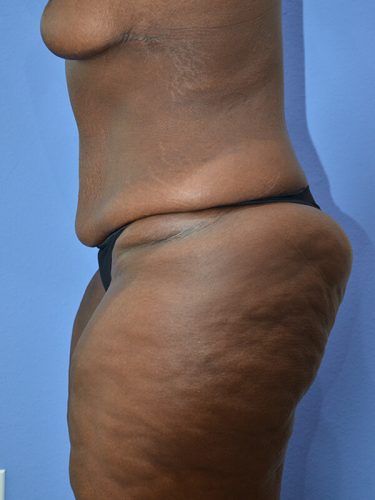
![Before Image]()
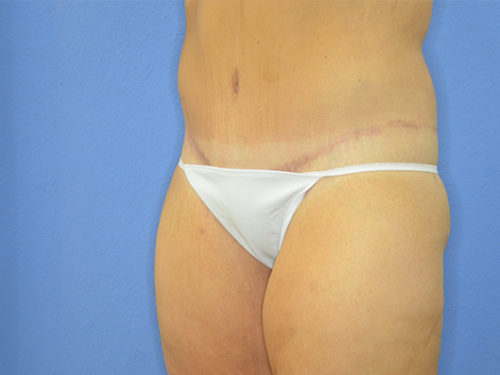
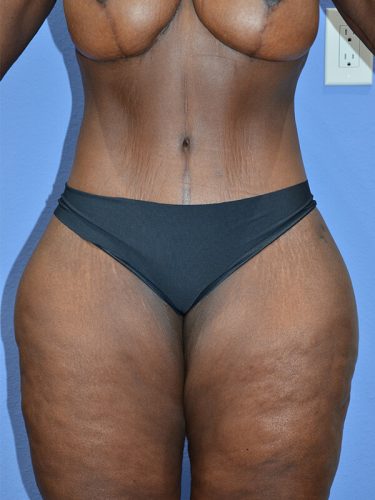
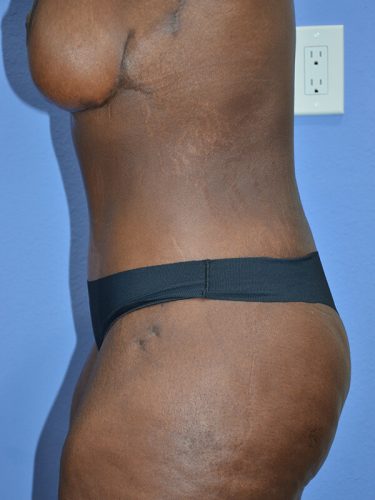
![After Image]()
![Before Image]()
![After Image]()
![Before Image]()
![After Image]()
![Before Image]()
![After Image]()
![Before Image]()
![After Image]()
![Before Image]()
![After Image]()
![Before Image]()
![After Image]()
![Before Image]()
![After Image]()
![Before Image]()
![After Image]()
![Before Image]()
![After Image]()
![Before Image]()
![After Image]()
![Before Image]()
![After Image]()
![Before Image]()
![After Image]()
![Before Image]()
![After Image]()
![Before Image]()
![After Image]()
![Before Image]()
![After Image]()
![Before Image]()
![After Image]()
![Before Image]()
![After Image]()
![Before Image]()
![After Image]()
![Before Image]()
![After Image]()
![Before Image]()
![After Image]()
![Before Image]()
![After Image]()
![Before Image]()
![After Image]()
![Before Image]()
![After Image]()
![Before Image]()
![After Image]()
Body Lift Patient 01


Body Lift Patient 02


Body Lift Patient 03